Do It Yourself CNC Plasma Cutter
Building your own CNC plasma cutter can be an exciting and rewarding project for enthusiasts and professionals alike. This comprehensive guide will explore the process of creating a DIY CNC plasma cutter, covering essential components, design considerations, and best practices.
Understanding CNC Plasma Cutters
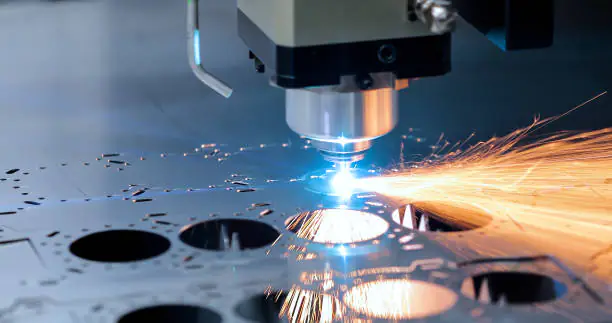
A CNC plasma cutter is a computer-controlled machine that uses a plasma torch to cut through conductive materials, primarily metal. The plasma cutting process involves creating an electrical channel of superheated, electrically ionized gas to cut through the workpiece. Key components of a CNC plasma cutter include:
- Plasma torch
- CNC table and gantry system
- Motion control system
- Computer and control software
- Water table (optional but recommended)

A typical CNC plasma cutter setup
Planning Your DIY CNC Plasma Cutter Project
Before diving into construction, careful planning is essential. Consider the following factors:
- Size: Determine the cutting area based on your typical workpiece sizes
- Budget: Establish a realistic budget for components and materials
- Skill Level: Assess your fabrication and electrical skills
- Time Commitment: Estimate the time you can dedicate to the project
- Intended Use: Consider whether it’s for hobby, small business, or industrial use
Create a detailed project plan, including a timeline, component list, and design sketches.
Designing the Table and Gantry
The table and gantry form the foundation of your CNC plasma cutter. Key considerations include:
- Table Design:
- Choose between a water table or downdraft design
- Ensure proper support to prevent warping under heat
- Incorporate easy slag removal features
- Gantry System:
- Opt for rigid materials like steel tubing or aluminum extrusions
- Design for minimal deflection under load
- Consider future upgrades when sizing components
- Size and Proportions:
- Typical sizes range from 2×2 feet for hobbyists to 5×10 feet for small businesses
- Ensure the gantry height accommodates your plasma torch and materials
- Material Choice:
- Steel: Durable and cost-effective, but heavy
- Aluminum: Lightweight and corrosion-resistant, but more expensive
Implementing the Motion System
The motion system is crucial for accurate and smooth cutting. Key components include:
- Linear Motion:
- Choose between linear rails, round rails, or V-wheels
- Consider factors like load capacity, precision, and maintenance
- Drive System:
- Options include rack and pinion, ball screws, or belt drives
- Rack and pinion is common for larger tables
- Ball screws offer high precision but at a higher cost
- Motors:
- Stepper motors: Cost-effective and easy to control
- Servo motors: Higher performance but more complex and expensive
- Motor Sizing:
- Calculate required torque based on your machine’s size and weight
- Factor in acceleration and cutting forces
Ensure proper alignment and tension in your motion system for optimal performance.
Selecting and Setting Up the Plasma Cutter
Choosing the right plasma cutter is crucial for your DIY CNC system. Consider:
- Cutting Capacity:
- Determine the maximum thickness you need to cut
- Factor in both clean cut and severance cut thicknesses
- Duty Cycle:
- Choose a unit with a duty cycle suitable for your intended use
- Higher duty cycles allow for longer continuous operation
- Input Power:
- Ensure your workshop can supply the required power
- Consider future upgrades when selecting input power
- Torch Options:
- Look for machines with CNC-ready torches
- Consider consumable cost and availability
- Brand and Support:
- Research reliability and aftermarket support
- Consider compatibility with CNC controllers
Proper setup of the plasma cutter includes:
- Secure mounting to the gantry
- Implementing proper grounding
- Setting up air supply and filtration
- Configuring torch height control (THC) if applicable
Implementing the Control System
The control system is the brain of your CNC plasma cutter. Key aspects include:
- Controller Choice:
- Popular options include Mach3, LinuxCNC, and dedicated CNC controllers
- Consider ease of use, cost, and compatibility with your components
- Computer Requirements:
- Ensure your PC meets the software’s specifications
- Consider a dedicated computer for your CNC system
- Wiring and Electronics:
- Use proper gauge wires for power and signals
- Implement noise reduction techniques
- Consider using breakout boards for easier connections
- User Interface:
- Set up a convenient control panel with essential functions
- Include emergency stop buttons in accessible locations
- Software Configuration:
- Configure motor settings (steps per unit, acceleration)
- Set up homing and soft limits
- Calibrate the machine axes
Proper setup of the control system is crucial for accurate and safe operation of your CNC plasma cutter.
Building the Water Table
A water table is highly recommended for CNC plasma cutting. It helps reduce smoke, improve cut quality, and extend consumable life. Key considerations include:
- Table Design:
- Typical depth is 2-4 inches
- Ensure proper support to handle the weight of water and materials
- Incorporate drainage and cleaning features
- Water Level Control:
- Implement a system to maintain consistent water level
- Consider automatic fill and drain systems
- Filtration:
- Design a system to remove metal particles and slag
- Consider both mechanical and chemical filtration methods
- Corrosion Protection:
- Use corrosion-resistant materials or apply protective coatings
- Implement proper grounding to minimize electrolysis
- Safety Features:
- Include overflow protection
- Ensure proper electrical isolation
A well-designed water table can significantly enhance the performance and safety of your CNC plasma cutter.
Safety Considerations
Safety should be a top priority in your DIY CNC plasma cutter project. Key safety features include:
- Enclosure:
- Design a proper enclosure to contain sparks and fumes
- Use fire-resistant materials
- Ventilation:
- Implement an effective fume extraction system
- Consider both overhead and downdraft ventilation
- Electrical Safety:
- Use proper grounding techniques
- Implement circuit protection devices
- Emergency Stops:
- Install easily accessible e-stop buttons
- Ensure all motion and cutting operations halt immediately when activated
- Personal Protective Equipment (PPE):
- Use appropriate eye protection, gloves, and clothing
- Consider hearing protection for prolonged use
- Fire Safety:
- Keep fire extinguishers nearby
- Implement fire detection systems for unattended operation
Prioritizing safety in your design and operation will ensure a safer and more enjoyable CNC plasma cutting experience.
Software and CAM Considerations
Effective use of your DIY CNC plasma cutter requires proper software setup:
- CAD Software:
- Choose software for creating your designs (e.g., AutoCAD, Fusion 360)
- Consider ease of use and compatibility with CAM software
- CAM Software:
- Select software to generate cutting paths (e.g., SheetCam, Fusion 360)
- Ensure compatibility with your chosen controller
- Nesting Software:
- Implement nesting to optimize material usage
- Consider automatic and manual nesting options
- Post-Processors:
- Set up proper post-processors for your specific machine configuration
- Test and refine post-processors for optimal results
- G-Code Simulation:
- Use simulation software to verify cutting paths before actual cutting
- Identify potential issues or collisions before they occur
Proper software setup will enhance the efficiency and capabilities of your CNC plasma cutter.
Challenges and Troubleshooting
Building a DIY CNC plasma cutter comes with its share of challenges. Common issues and solutions include:
- Alignment Problems:
- Use precision measuring tools to ensure proper alignment
- Implement adjustable mounts for fine-tuning
- Electrical Noise:
- Use shielded cables and proper grounding techniques
- Separate high-voltage and low-voltage components
- Cut Quality Issues:
- Experiment with cutting parameters (speed, height, amperage)
- Ensure proper consumable maintenance and replacement
- Motion System Backlash:
- Implement backlash compensation in software
- Consider upgrading to higher precision components
- Software Configuration:
- Consult online forums and documentation for setup guidance
- Perform thorough testing and calibration
Patience and persistence are key in overcoming these challenges.
Maintenance and Upgrades
To keep your DIY CNC plasma cutter in top condition:
- Regular Maintenance:
- Lubricate moving parts according to a schedule
- Check and tighten all bolts and connections
- Clean and inspect the machine regularly
- Consumable Management:
- Monitor and replace torch consumables as needed
- Keep spare parts on hand to minimize downtime
- Software Updates:
- Keep your control software and firmware up to date
- Stay informed about new features and improvements
- Performance Monitoring:
- Track cut quality and machine performance over time
- Address any degradation promptly
- Upgrades:
- Consider future upgrades like automatic tool changers or additional axes
- Plan for scalability in your initial design
Regular maintenance and strategic upgrades will extend the life and capabilities of your machine.
Conclusion
Building a DIY CNC plasma cutter is a challenging but rewarding project that combines mechanical, electrical, and software engineering. With careful planning, attention to detail, and a commitment to safety, you can create a powerful tool for metal fabrication that rivals commercial machines.
The journey of building your own CNC plasma cutter offers invaluable learning experiences and the satisfaction of creating a custom machine tailored to your needs. As you progress through the project, you’ll gain deep insights into CNC technology, plasma cutting principles, and machine design.
Remember that success in this project comes not just from the end result, but from the problem-solving and skills developed along the way. Embrace the challenges, celebrate your successes, and don’t hesitate to seek help from the vibrant community of DIY CNC enthusiasts.
Whether you’re a hobbyist, artist, or small business owner, your DIY CNC plasma cutter can open up new possibilities in metal fabrication, allowing you to bring your creative visions to life with precision and efficiency.
FAQ
1. How much does it cost to build a DIY CNC plasma cutter?
Costs can range from $1,500 for a basic setup to $15,000+ for a more advanced machine, depending on size, components, and capabilities.
2. What skills do I need to build a CNC plasma cutter?
Basic metalworking skills, some knowledge of electronics, and familiarity with CAD/CAM software are helpful. Willingness to learn and problem-solve is essential.
3. How long does it take to build a DIY CNC plasma cutter?
The time frame can vary from a few weeks for a simple machine to several months for a more complex build, depending on your available time and experience level.
4. What materials can a DIY CNC plasma cutter work with?
CNC plasma cutters can cut conductive materials, primarily metals like mild steel, stainless steel, aluminum, and copper. Thickness capabilities depend on your chosen plasma cutter.
5. Can a DIY CNC plasma cutter be as accurate as commercial machines?
With careful design and quality components, a DIY machine can approach the accuracy of entry-level commercial machines. However, achieving the precision of high-end industrial machines may be challenging.
6. Is it cheaper to build or buy a CNC plasma cutter?
Building can be cheaper, especially for larger or more specialized machines. However, the time investment should be considered in the overall cost. For some, the learning experience and customization options make building worth the effort even if the monetary savings are minimal.

