Building a CNC laser cutter is an exciting project that blends creativity, technical skills, and the power of automated machinery. If you’ve been contemplating constructing your own CNC laser cutter but are not sure where to begin, this comprehensive guide will walk you through each step in detail. From understanding the key components to final assembly, you’ll learn how to build a machine capable of cutting, engraving, and shaping with precision.
Introduction to CNC Laser Cutters
What is a CNC Laser Cutter?
A CNC laser cutter is a machine that uses a laser beam controlled by Computer Numerical Control (CNC) technology to cut, engrave, or mark different materials. Unlike traditional cutting methods, laser cutters offer precision without making physical contact with the material. This is particularly useful in intricate designs and detailed applications involving materials like wood, metal, acrylic, and plastic.
The laser beam follows a predetermined path programmed via G-code, which dictates the speed, path, and intensity of the laser. This allows for highly consistent and repeatable operations, whether you’re creating custom parts or artistic designs.
Why Build a CNC Laser Cutter?
Building your own CNC laser cutter provides several benefits, including:
- Cost Savings: Commercial CNC laser cutters are expensive. Building one can significantly reduce the costs.
- Customization: You can customize your laser cutter to suit your specific needs, whether it’s for engraving, cutting, or prototyping.
- Learning Experience: The building process gives you an in-depth understanding of how CNC machines work, from the motion control system to optics and software.
Key Components of a CNC Laser Cutter
Before diving into the construction process, it’s important to familiarize yourself with the main components that make up a CNC laser cutter.
1. Laser Tube
The laser tube is the heart of your CNC laser cutter. It generates the laser beam needed for cutting. CO2 laser tubes are commonly used due to their high efficiency and affordability.
- Power Rating: The power rating of the laser tube determines the thickness and type of materials that can be cut. A 40-100W tube is usually sufficient for most hobbyist and small business needs.
- Cooling System: To ensure the laser tube functions properly, a water cooling system is necessary.
2. Stepper Motors and Drivers
The stepper motors control the movement along the X, Y, and sometimes Z axes. These motors are powered by drivers, which provide precise control over their movement to ensure that the laser head follows the programmed path accurately.
- Popular Option: A NEMA 17 stepper motor is often used for lightweight applications, whereas a NEMA 23 is preferred for larger builds.
3. CNC Frame and Rails
The frame forms the structure of your machine, while the rails provide smooth movement. The frame is generally made of aluminum extrusion due to its strength, lightweight properties, and ease of assembly.
- Rails: Use linear guide rails to ensure smooth and precise movement of the laser head along the axes.

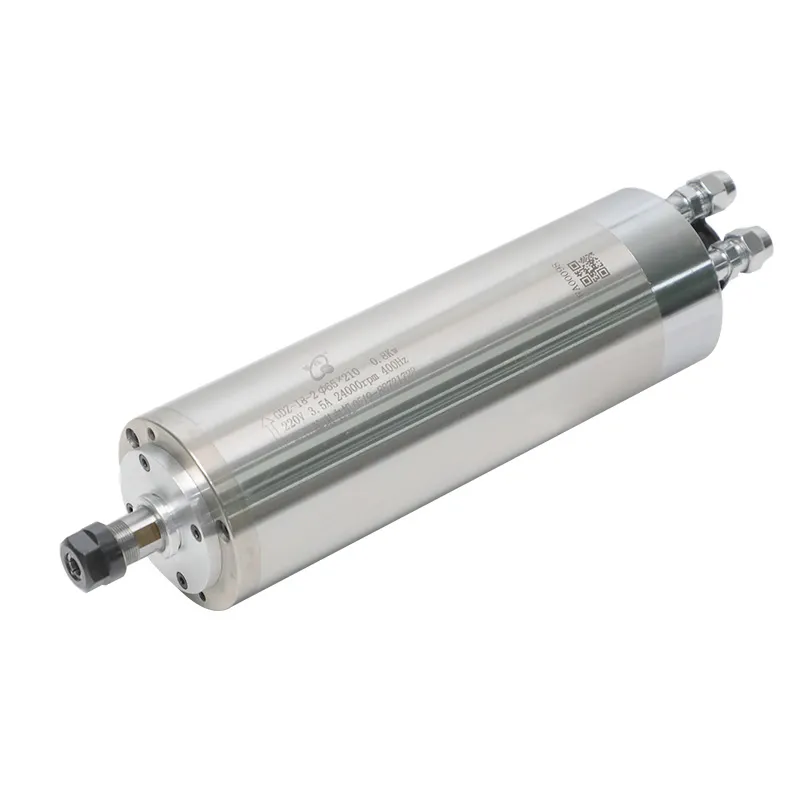
Components like the 24000RPM 0.8KW ER11 Water-Cooled Spindle can also be used if your laser cutter needs to perform milling operations in addition to cutting.
4. Laser Controller Board
The laser controller board is the brain of the CNC laser cutter. It interprets G-code and directs the movements of the stepper motors and the laser tube.
- GRBL Controllers: Many DIY projects use GRBL-based controller boards due to their open-source nature, ease of use, and compatibility with Arduino.
5. Mirrors and Lenses
The laser beam needs to be directed from the tube to the cutting surface, which is done using mirrors. The focusing lens then focuses the laser to achieve a high-intensity point capable of cutting through materials.
- Alignment: Mirrors must be aligned precisely to direct the laser correctly.
- Lens Quality: The quality of the lens affects the sharpness and precision of the cut.
6. Power Supply
The power supply provides energy to the laser tube, motors, and controller board. Ensure the power supply matches the specifications of your components.
7. Software
The CNC laser cutter requires software to generate the G-code and control the machine.
- CAD Software: Use software like Inkscape or CorelDRAW to design the part.
- G-Code Generators: Software like LaserGRBL or LightBurn converts the design into machine-readable G-code.
Step-by-Step Guide to Building a CNC Laser Cutter
1. Designing the Frame
The frame is the backbone of your CNC laser cutter, so it needs to be sturdy and well-designed.
- Material Selection: Use aluminum extrusions (such as 20x20mm or 40x40mm sections) for the frame as they are easy to assemble and provide good rigidity.
- Cutting and Assembly: Cut the frame pieces to the required length and assemble them using L-brackets and M5 screws.
2. Installing Linear Rails and Stepper Motors
- Mounting the Rails: Secure the linear rails along the X and Y axes. Ensure they are level and parallel to avoid any issues with the laser head’s movement.
- Installing Stepper Motors: Attach the stepper motors at the ends of the rails, securing them with mounting brackets.
3. Assembling the Laser Mount
The laser mount holds the laser head, allowing it to move along the X and Y axes to cut or engrave the workpiece.
- Laser Head: Mount the focusing lens onto the laser head and align it to be perpendicular to the workpiece.
- Mirror Alignment: Place the mirrors at appropriate positions and adjust them to direct the laser beam to the focusing lens.
4. Wiring the Components
The wiring is one of the most critical parts of building a CNC laser cutter.
- Power Supply to Laser Tube: Connect the power supply to the laser tube, ensuring the correct voltage and amperage.
- Controller Board: Wire the controller board to the stepper motors, end stops, and the laser power supply.
- Emergency Stop Button: Include an emergency stop switch in your design for safety.
5. Setting Up the Laser Control System
- Controller Installation: Install the laser controller board in a convenient location on the frame.
- Software Setup: Install LaserGRBL or LightBurn on your computer. Connect the laser cutter via USB and configure the settings (such as laser power, speed, and movement limits).
6. Testing and Calibration
Testing your CNC laser cutter before full operation is critical to ensure everything functions properly.
- Dry Run: Run a dry test without activating the laser to check for movement accuracy.
- Aligning Mirrors: Use a low-power pulse to align the mirrors properly, ensuring the laser beam hits the center of each mirror.
- Calibration: Adjust the stepper motor drivers to achieve smooth movement and the right speed.
Safety Measures When Building and Using a CNC Laser Cutter
1. Eye Protection
Always wear safety goggles that match the wavelength of your laser. Direct exposure to a laser beam can cause permanent damage to the eyes.
2. Proper Ventilation
Laser cutting can produce fumes and particulates, especially when cutting materials like plastic or MDF. Install an extraction fan or air filter to remove harmful fumes.
3. Emergency Stop
Include an emergency stop button that can instantly cut power to the laser. This feature is crucial for preventing accidents during operation.
Recommended Components for Building a CNC Laser Cutter
| Component | Description | Where to Get |
|---|---|---|
| CO2 Laser Tube | Generates the laser beam for cutting. | Local laser component suppliers or online platforms like Amazon. |
| Stepper Motors | Controls the movement along X/Y axes. | NEMA 23 Stepper Motor. |
| Controller Board | Processes G-code commands. | GRBL-based boards are widely available and suitable for DIY projects. |
| Cooling System | Keeps the laser tube at a constant temperature. | Basic water pump and cooling container are usually enough. |
| Mirrors and Lenses | Directs and focuses the laser beam. | Mirrors and lenses should be purchased from reputable CNC equipment suppliers for high quality. |
FAQs
1. What are the main components needed to build a CNC laser cutter?
The main components are the laser tube, controller board, stepper motors, power supply, linear rails, and mirrors/lenses. Each part plays a crucial role in building a functional CNC laser cutter.
2. How much does it cost to build a CNC laser cutter?
The cost varies depending on the quality of the components, but typically, a DIY CNC laser cutter can be built for $500 to $2000.
3. What software is needed to run a CNC laser cutter?
You need CAD software for designing, such as Inkscape, and G-code generating software like LaserGRBL or LightBurn to control the CNC laser cutter.
4. What materials can a CNC laser cutter handle?
A CNC laser cutter can handle wood, acrylic, plastic, fabric, and thin metal sheets (with higher power lasers).
5. How do you align the laser mirrors?
To align the laser mirrors, use a low-power pulse to verify that the laser hits the center of each mirror as it travels from the laser tube to the workpiece.
Conclusion
Building your own CNC laser cutter is a challenging but incredibly rewarding project that offers flexibility, precision, and the satisfaction of crafting your own tools. By following this guide, you can create a customized CNC laser cutter that suits your needs, whether it’s for engraving, cutting, or even prototyping. Key components like the 24000RPM 0.8KW ER11 Water-Cooled Spindle enhance the precision and versatility of your build, giving you a reliable and efficient machine.

