Building your own CNC mill can be an exciting and rewarding project. Not only does it provide valuable experience, but it also gives you the ability to produce custom parts from various materials, including wood, metal, and plastics. A CNC mill brings precision, repeatability, and a high degree of automation to your projects. But how do you go about building one? This comprehensive guide will walk you through the entire process of building a CNC mill, from understanding its components to assembling and calibrating the machine.
Understanding the Basics of CNC Milling
Before diving into the technical aspects of building a CNC mill, it’s essential to understand what a CNC milling machine is and how it works. CNC, which stands for Computer Numerical Control, is a system that controls machine tools like mills, lathes, and routers through a computer program. Unlike manual milling machines, CNC mills can follow highly detailed instructions to make cuts with extreme precision.
Key Components of a CNC Mill
To successfully build a CNC mill, you’ll need to understand its main components:
- Frame: The structure that holds all the parts of the CNC mill together. It must be stable and rigid.
- Linear Rails: Guide rails that allow for precise linear movement of the cutting tool.
- Spindle: The rotating part of the CNC machine that holds and powers the cutting tool. It is crucial for determining the type of materials you can cut.
- Stepper Motors: Motors that provide movement control for the CNC, translating commands into precise shifts of the tool.
- Control System: A computer or microcontroller that uses G-code to command the movement and operation of the mill.
- Work Surface/Table: The surface where the material to be cut is secured.
Different Types of CNC Mills
CNC mills can vary significantly in complexity and capability, ranging from small, benchtop mills to industrial-grade machines. The three main types are:
- Benchtop Mills: Compact, easy to use, and perfect for small projects or hobbyist use.
- Vertical Mills: Larger machines used for heavier projects and larger cutting areas.
- Horizontal Mills: These have a horizontally-aligned spindle, which is best suited for milling slots and grooves.
Planning Your CNC Mill Project
1. Defining Your Requirements
Before gathering parts, define what you want from your CNC mill. Ask yourself questions like:
- What type of materials will I work with? This will determine the type of spindle and structure you need.
- How large will the cutting area be? If you need to cut large pieces of wood or metal, you’ll need a bigger mill.
- What precision do I require? The complexity of your projects will influence the type of motors, guides, and electronics required.
Planning will ensure that your CNC mill meets your needs without breaking your budget.
2. Budgeting
Building a CNC mill requires a significant investment, and the cost will depend largely on the quality of components you choose. Here’s a breakdown of potential expenses:
| Component | Estimated Cost Range ($) |
|---|---|
| Frame | 200 – 1000 |
| Spindle | 150 – 800 |
| Stepper Motors & Drivers | 100 – 400 |
| Control Electronics | 100 – 300 |
| Linear Rails | 100 – 500 |
| Miscellaneous (Bolts, Power Supply, Wiring) | 50 – 150 |
The costs can vary based on quality, supplier, and whether you choose to buy new or used components.

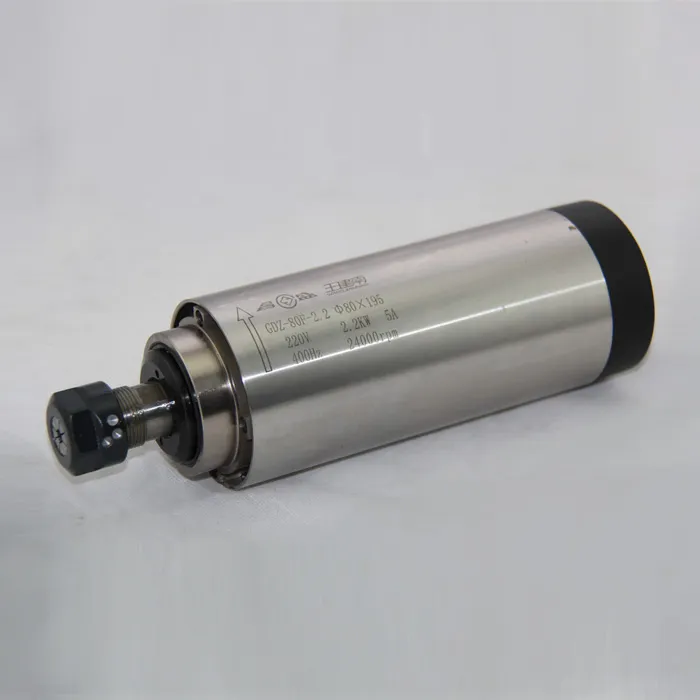
Image Credit: 2.2KW ER20 Air-Cooled Spindle
Gathering Components for Your CNC Mill
1. Frame and Structure
The frame is the backbone of your CNC mill. It must be strong enough to hold all the parts securely and withstand the forces exerted by milling.
- Materials: Aluminum extrusions are a popular choice because they’re lightweight and strong. Steel is used for larger, more rigid frames.
- DIY or Pre-made: You can either build a frame from scratch using steel/aluminum or buy a ready-made CNC frame kit.
2. Linear Rails and Ball Screws
Linear rails are used to guide the movement of the cutting head in a straight line, ensuring precision.
- Profiled Rails: More rigid and used for high-precision applications.
- Ball Screws: Used for converting rotary motion into linear motion. Ball screws are more precise compared to other types of leadscrews.
Ball screws should be carefully selected for low friction and smooth movement. Incorrect ball screws can result in backlash, leading to inaccurate cuts.
3. Spindle Selection
The spindle is what does the cutting, and its choice depends on the type of material you’ll be working with.
- Air-Cooled Spindles: Simple to set up but may overheat with prolonged use.
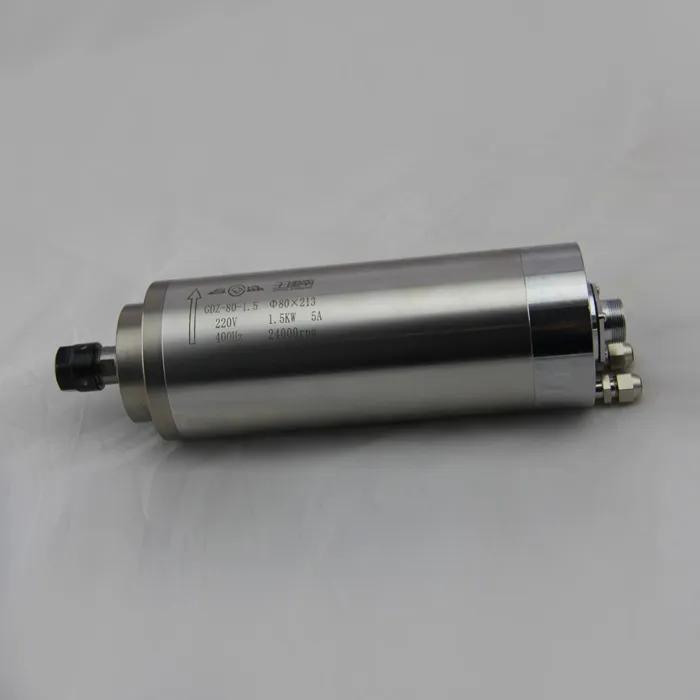
- Water-Cooled Spindles: Offer better cooling, allowing for continuous operation. For example, a 24000RPM 3.2KW ER20 Water-Cooled Spindle is an excellent choice for extended runs and high precision.
4. Stepper Motors and Drivers
Stepper motors are used to control movement in each axis of your CNC mill. They translate electronic signals into mechanical movement.
- NEMA 23 or NEMA 34 are popular choices for DIY CNC builds. Larger stepper motors provide more torque but require compatible drivers and power supplies.
5. Control System
The control system includes the electronics needed to run the CNC machine. You’ll need a controller board that interfaces between the computer and the stepper motors. Common choices include Arduino-based controllers (like GRBL) or more sophisticated options like Smoothieboard.
Building the CNC Mill
Step 1: Building the Frame
Begin by assembling the frame. Ensure it’s stable and level to provide a solid foundation for the entire CNC machine.
- Assemble Base Frame: Securely attach all frame components using bolts and brackets. The base must be completely level to avoid issues with precision.
- Add Supports: Install any cross-beams or additional supports to add stability.
Step 2: Installing Linear Rails and Ball Screws
Attach the linear rails to the frame. These must be perfectly parallel to avoid binding or inaccuracies in the movement.
- Attach Guide Rails: Use precision tools to ensure the rails are straight and parallel.
- Install Ball Screws: The ball screws should be aligned with the guide rails to ensure smooth movement. Proper installation prevents backlash and maintains precision.
Step 3: Mounting Stepper Motors
Attach stepper motors to each axis, ensuring they’re properly aligned with the ball screws. Motors must be securely mounted to prevent movement during operation.
- Motor Couplers: Use flexible couplers to connect the motor shafts to the ball screws. This helps absorb any misalignment between the two.
Step 4: Mounting the Spindle
Mount the spindle on the Z-axis of the CNC mill. The spindle should be mounted securely to prevent vibrations, which could affect the quality of the cuts.
- Spindle Mount: Use a spindle mount that fits the diameter of your spindle. The mount should allow for easy adjustment if needed.
Step 5: Wiring and Connecting Electronics
Once the mechanical components are installed, it’s time to wire up the electronics.
- Controller Board: Connect the stepper motors to the controller board, ensuring each axis is properly connected.
- Power Supply: Make sure the power supply matches the voltage and current requirements of your stepper motors and spindle.
- Limit Switches: Install limit switches on each axis to prevent the machine from moving beyond its intended range.

Image Credit: 24000RPM 1.5KW ER11 Water-Cooled Spindle
Calibration and Testing
Step 1: Calibrating Steps per Unit
Each stepper motor moves a specific distance per step. You’ll need to calibrate the steps per unit for each axis to ensure that the machine moves accurately according to your commands.
- Test Movements: Use a ruler or calipers to measure actual movement versus expected movement and adjust the steps per unit accordingly.
Step 2: Squaring the Machine
Ensure all axes are perpendicular to each other. This can be checked using a square and making minor adjustments to the linear guides or frame.
Step 3: Setting Up Limit Switches
Limit switches act as safety stops that prevent the machine from overextending its range. Test each switch to ensure it’s functional and properly positioned.
Software Setup
To operate your CNC mill, you will need the following software:
- CAD Software: Used to create designs. Programs like AutoCAD or Fusion 360 allow you to create precise models of the part you want to cut.
- CAM Software: Converts CAD files into G-code. VCarve Pro or Mastercam are popular choices for generating toolpaths.
- Control Software: Sends the G-code to your CNC mill. Mach3 or LinuxCNC are commonly used to interface with the controller board and operate the machine.
Commonly Used Software
| Software Type | Examples |
|---|---|
| CAD (Design) | AutoCAD, Fusion 360 |
| CAM (Toolpath) | VCarve, Mastercam |
| Control Software | Mach3, LinuxCNC |
Safety Considerations
1. Protective Gear
Always wear safety glasses when operating a CNC mill to protect against flying debris. Ear protection is also recommended when using loud spindles.
2. Emergency Stop Button
Make sure your CNC setup includes an emergency stop button that can be easily accessed. This will allow you to quickly stop all movement if something goes wrong.
3. Proper Ventilation
Cutting materials like wood and certain plastics can generate dust and fumes. Make sure your workspace has proper ventilation or dust extraction to maintain a safe working environment.
FAQs
1. What materials can a DIY CNC mill cut?
A DIY CNC mill can cut wood, plastics, soft metals (like aluminum), and, with the right spindle, even harder metals such as steel.
2. How long does it take to build a CNC mill?
The time required depends on the complexity of the machine and your experience. On average, expect to spend 40-80 hours from start to finish.
3. What type of spindle is best for a DIY CNC mill?
A water-cooled spindle, such as the 24000RPM 3.2KW ER20 Water-Cooled Spindle, is ideal for DIY CNC mills due to its continuous operation capability and precision.
4. How much does it cost to build a CNC mill?
Costs can vary, but a basic DIY CNC mill typically costs between $800 to $2000, depending on the quality of components.
5. Do I need experience to build a CNC mill?
While prior experience with machining or electronics is helpful, there are numerous tutorials and resources available that make building a CNC mill accessible for beginners.
Conclusion
Building a CNC mill is a challenging yet rewarding project that offers a deep understanding of machining, electronics, and precision engineering. By selecting high-quality components, planning thoroughly, and assembling carefully, you can create a CNC mill that meets your specific needs. From woodworking to metal fabrication, a CNC mill offers flexibility and precision that can elevate your projects to the next level. If you are interested in enhancing your CNC capabilities, explore the range of high-quality CNC spindles available at spindlemotorshop.com to take your machine to the next level.

