Building a CNC plasma cutter from scratch can be a rewarding endeavor for both hobbyists and professionals. A plasma cutter is an essential tool for many industries, offering the ability to cut metals with precision and speed. By constructing your own CNC plasma cutting system, you can customize it to suit your specific needs and save costs. This guide will take you step by step through the process of building a CNC plasma cutter, focusing on components, assembly, control systems, and best practices to ensure a smooth build.
Introduction to CNC Plasma Cutters
What is a CNC Plasma Cutter?
A CNC plasma cutter is a machine that uses a plasma torch to cut through electrically conductive materials like steel, aluminum, and brass. The term CNC refers to Computer Numerical Control, which means the plasma cutter’s movement is controlled by a computer following pre-programmed paths. Plasma cutting is highly effective for detailed, intricate shapes and allows for efficient material use.
Why Build Your Own CNC Plasma Cutter?
Building your own plasma cutter has numerous benefits:
- Cost Efficiency: Commercial plasma cutters can be expensive, especially for custom models.
- Customization: You can build a machine that meets your specific size, power, and control requirements.
- Learning Opportunity: Gain in-depth knowledge of CNC machines, electrical systems, and programming.
Key Components of a CNC Plasma Cutter
1. Plasma Torch
The plasma torch is the core component of any plasma cutter. It ionizes the gas to create the plasma arc that cuts through the material.
- Manual Torch: Suitable for beginners.
- Machine Torch: Designed specifically for CNC automation with a controlled nozzle.
2. Torch Height Control (THC)
Torch Height Control (THC) maintains the correct distance between the plasma torch and the workpiece, which is critical for achieving consistent cuts.
- Proma Torch Height Control: A popular option that is easy to set up and helps to maintain the ideal height.
3. CNC Table
A CNC plasma cutting table provides the work surface on which the material rests.
- Water Table: Reduces dust and minimizes warping by cooling the metal during the cutting process.
- Flat Table: Often used for thicker metals; it provides a stable surface for cutting.
4. Frame and Axis Components
The frame forms the skeleton of your plasma cutter, while the axis components determine its movement.
- Square Tube Steel: Commonly used for building the frame due to its strength.
- Linear Rails and Bearings: Used for smooth movement along the X, Y, and Z axes.

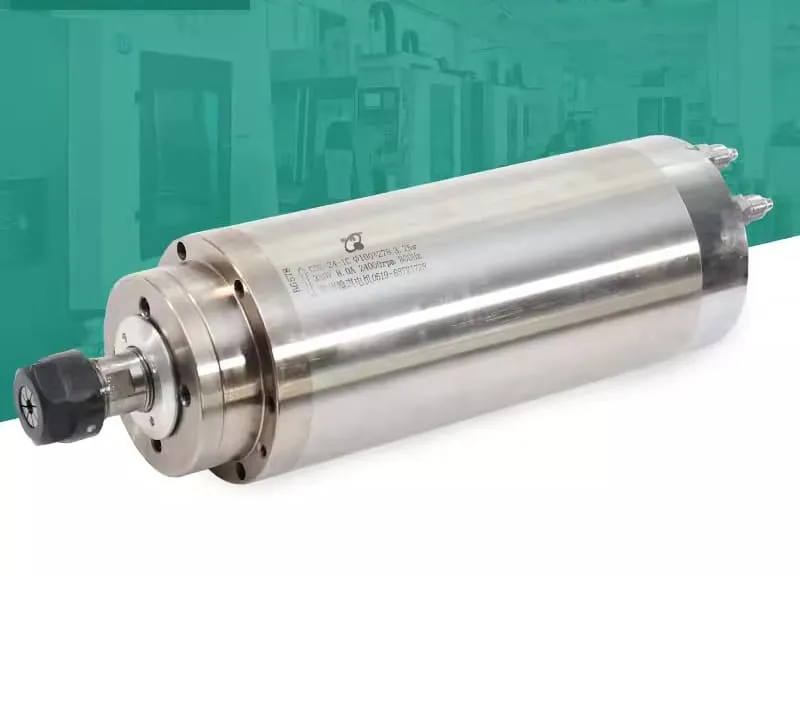
The 24000RPM 3.7KW ER20 Water-Cooling Spindle can be used to achieve precise control over the cutting motor in custom CNC builds.
Steps to Build a CNC Plasma Cutter
1. Designing the Plasma Cutter
Designing your plasma cutter is the first step towards a successful build. Start by sketching out your CNC table and ensuring that the size fits your workspace and needs.
- Determine Size: Choose the table size based on the largest sheet of material you plan to cut.
- Frame Structure: Use steel square tubes for a durable frame that can support heavy materials.
- Movement System: Decide whether you want rack and pinion or lead screws for movement along the X, Y, and Z axes.
2. Gathering Tools and Materials
To build a CNC plasma cutter, you need several key tools and materials:
- Plasma Torch: A machine torch with a CNC interface is recommended for automated control.
- Steel Tubes: To construct the frame and base.
- Stepper Motors: Provide movement for each axis.
- Control Software: Software like Mach3 or LinuxCNC will control the cutting process.
| Component | Purpose |
|---|---|
| Stepper Motors | Provide movement along the axes |
| Steel Tubes | Used for frame construction |
| Torch Height Control | Maintain optimal torch distance |
| Linear Bearings | Ensure smooth axis movement |
3. Assembling the Frame
The frame is the backbone of your CNC plasma cutter. Use square tube steel to construct a robust frame that can withstand the weight of the material and the motion of the cutting head.
- Welding the Frame: Weld the steel tubes to create the CNC table’s frame. Make sure the joints are solid and the structure is level.
- Installing Linear Rails: Attach the linear rails to the frame, ensuring they are aligned correctly for smooth movement.
4. Mounting the Motors and Axes
The next step involves setting up the movement system by mounting the motors and aligning the axes.
- Install Stepper Motors: Mount the stepper motors to control each axis. Connect the motor shafts to lead screws or rack and pinion gears.
- Aligning the Axis: Proper alignment is crucial to avoid wobbling or errors during cutting. Use a spirit level and adjust until all axes move smoothly.
5. Setting Up Torch Height Control (THC)
Torch Height Control (THC) keeps the distance between the torch and the workpiece consistent, which is essential for clean cuts.
- Proma THC: A simple, effective solution for maintaining optimal torch height. Mount the THC unit and connect it to the CNC controller.
6. Installing the Plasma Cutter
Now that the frame and movement system are in place, it’s time to set up the plasma cutter.
- Mount the Torch: Secure the plasma torch to the Z-axis. Ensure it is securely attached but can be easily adjusted if needed.
- Connect the Cutter: Connect the plasma cutter to your CNC controller to allow for automated operation.
7. Setting Up CNC Control System
A CNC controller is necessary to operate your plasma cutter, providing commands to the stepper motors and plasma torch.
- Controller Options: Consider controllers like GRBL or Mach3, which are popular for DIY CNC projects.
- Software Setup: Install CNC control software on your computer. This software will convert G-code into signals that the controller uses to operate the motors and torch.
8. Wiring and Electronics
Proper wiring and electronics are vital to ensure your plasma cutter functions as expected.
- Power Supply: Provide stable power to all components, including motors, torch height control, and the plasma cutter.
- Emergency Stop Button: Install an emergency stop switch to immediately cut power if something goes wrong during operation.
9. Running Your First Test Cut
After all components are in place, it’s time for a test run.
- Dry Run: Perform a dry run with the plasma cutter off to check for any issues with movement or alignment.
- Test Cut: Start with a simple design and make adjustments based on the results to optimize the cutting parameters.
Best Practices for Building a CNC Plasma Cutter
1. Choosing the Right Plasma Cutter
The type of plasma cutter you choose will impact the quality of your cuts. A machine torch plasma cutter is ideal for CNC systems, as it offers better consistency and control compared to a handheld torch.
2. Ensuring Proper Grounding
Proper grounding is crucial when working with plasma cutters, as poor grounding can lead to inconsistent cuts or even pose a safety hazard. Ensure that the machine is properly grounded to prevent electrical issues.
3. Optimizing Torch Height and Cutting Speed
Torch height and cutting speed are key to achieving high-quality cuts.
- Torch Height: Use Torch Height Control (THC) to automatically adjust the height during the cutting process, accounting for any material warping.
- Cutting Speed: Adjust the feed rate according to the material type and thickness. Too fast, and the arc may extinguish; too slow, and the material may overheat.
CNC Plasma Cutter Safety Tips
1. Wear Proper Protective Gear
- Safety Glasses: Protect your eyes from bright plasma arc light.
- Gloves: Wear protective gloves to guard against burns or sharp edges.
2. Use Ventilation or a Water Table
Plasma cutting produces fumes and sparks. A water table can help minimize the dust produced during cutting, while proper ventilation will prevent the accumulation of harmful fumes.
3. Keep a Fire Extinguisher Nearby
Always have a fire extinguisher readily available when plasma cutting. Sparks and heat from the plasma arc can ignite materials, and a fire extinguisher will help you quickly put out any accidental fires.
FAQs
1. What is Torch Height Control (THC), and why is it important?
Torch Height Control (THC) is a system that maintains the correct distance between the plasma torch and the material. Proper height is essential to ensure clean cuts and to prolong the life of consumables.
2. How much does it cost to build a CNC plasma cutter?
The cost can vary depending on the components used. On average, building a basic CNC plasma cutter might cost between $1,000 to $2,500, depending on factors like the size of the machine and the type of plasma cutter chosen.
3. Can I use a handheld plasma cutter for CNC?
While it is possible, it is not recommended. A machine torch provides better consistency and is easier to automate compared to a handheld torch.
4. What materials can I cut with a CNC plasma cutter?
CNC plasma cutters are typically used to cut metals such as steel, aluminum, and brass. They can cut any electrically conductive material.
Conclusion
Building a CNC plasma cutter is a challenging yet rewarding project that provides complete control over the design and specifications of your machine. By following the steps detailed above—such as designing the table, setting up torch height control, and ensuring proper wiring and safety—you will be well on your way to creating a custom plasma cutter suited to your specific needs.

