When working with CNC (Computer Numerical Control) machines, the question often arises: how do you create G-code for these powerful devices? G-code is the language that tells your CNC machine how to move, where to cut, and how fast to go. It’s the backbone of CNC machining, transforming your design into a tangible product. This comprehensive guide will walk you through the steps of making G-code for CNC machines, ensuring you get precision results every time.
Let’s dive in and discover what goes into making G-code, why it is essential, and how you can create your own. Whether you’re a beginner or looking to refine your skills, this guide will provide valuable insights.
Understanding G-Code and Its Role in CNC Machining
Before we get into creating G-code, it’s important to understand what G-code is and why it’s so significant for CNC machining. Essentially, G-code is a language that instructs a CNC machine on what actions to perform. It tells the machine where to move, how fast to move, and the operations to execute such as cutting, drilling, or milling.
The language is composed of various commands, which are usually a combination of letters and numbers. These commands dictate the tool path, cutting speed, feed rate, and other critical instructions that the CNC machine must follow to create a part accurately.
- G0 (Rapid Move): This command moves the tool to a specific point at the fastest possible rate.
- G1 (Linear Interpolation): Directs the machine to move in a straight line at a specified speed.
- G2/G3 (Circular Interpolation): Commands for making clockwise or counterclockwise circular movements.
- M commands (Miscellaneous Functions): These control things like starting the spindle or coolant.
The process of converting designs into G-code involves translating the CAD (Computer-Aided Design) files into a format that the CNC machine can understand. This requires using CAM (Computer-Aided Manufacturing) software to create precise code.
Tools You Need to Create G-Code for CNC Machines
1. CAD Software
To create G-code, the first step is to have a design ready. This is usually done with CAD software, such as AutoCAD, SolidWorks, or Fusion 360. CAD software allows you to create detailed models of your part with all the necessary measurements.
- AutoCAD: Ideal for precise 2D and 3D design.
- Fusion 360: Suitable for both CAD and CAM operations, making it a complete solution.
2. CAM Software
Once you have a design, you need CAM software to generate G-code from your CAD model. CAM programs allow you to define various machining parameters, such as feed rate, cutting speed, tool paths, and the type of cutter to use.
- Mastercam: One of the most popular CAM software for generating G-code.
- Fusion 360 CAM Module: A built-in CAM solution that integrates seamlessly with its CAD system.
CAM software helps translate the visual designs from CAD into step-by-step instructions for the CNC machine.
3. CNC Machine Controller
The controller interprets the G-code and runs the CNC machine. Controllers can either be standalone units attached to the machine, or computer-based software like Mach3 or GRBL that converts G-code into physical movement.
A Typical Workflow Example for Creating G-Code
- Create Your Design in CAD: You start by drawing your part in a CAD program. Make sure to define all dimensions and geometry.
- Import the CAD File into CAM: Load your CAD file into a CAM program and set the machining parameters, including the type of cutter and the paths the machine should follow.
- Generate Tool Paths: The CAM software will allow you to specify the tool paths, define drilling canned cycles, and add features such as tool length compensation.
- Post-Process: Use the CAM software to generate G-code. The output is often a .nc or .tap file that can be loaded into the CNC machine.
- Load into the CNC Controller: Finally, load the G-code into the CNC controller to run the job.
Writing G-Code Manually vs. Using CAM Software
It is possible to write G-code manually, which gives you a deep understanding of how CNC machines operate. Writing G-code manually can be beneficial for simple operations or for learning purposes.
Writing G-Code Manually
For beginners, it’s good practice to understand the basics by manually coding simple commands. Here’s an example of a basic G-code script to cut a simple square:
In the above code:
- G21 sets the unit of measurement to millimeters.
- G90 sets absolute positioning.
- G1 commands are used for linear movements.
Using CAM Software for G-Code Generation
For more complex projects, writing G-code manually becomes impractical. Using CAM software automates the process and ensures precision, which is especially important when working with complex geometries or tight tolerances.
Fusion 360, for example, allows you to generate G-code for multi-axis operations and different types of materials. This versatility is particularly beneficial for operators working in industries like aerospace or automotive, where precision is crucial.
G-Code Essentials for CNC Machine Control
To properly control a CNC machine, it’s essential to understand the different types of commands that G-code can include:
- Movement Commands (G0, G1, G2, G3): These commands control the tool’s movement across different axes.
- Coolant Commands (M07, M08): These control when to start and stop coolant, which is necessary to keep the tool cool during cutting.
- Spindle Commands (M03, M05): These commands control the spindle’s rotation, starting, stopping, and the direction of the rotation (clockwise or counter-clockwise).
- Unit Setting (G20, G21): You can use these commands to change units between inches (G20) and millimeters (G21). This is crucial to ensure that the CNC machine interprets the measurements correctly.
Examples of Drilling Canned Cycles
Drilling canned cycles are preprogrammed G-code routines used to perform common operations like drilling multiple holes. These commands simplify the G-code and save time.
Example of a Drilling Canned Cycle
The command G81 is used for simple drilling:
In this example:
- G81 starts the drilling cycle.
- X, Y, Z denote the location and depth of the hole.
- R indicates the retract position, and F specifies the feed rate.
Using canned cycles like G81 makes it easier to replicate similar operations multiple times without rewriting code for each instance.
Best Practices for Creating Effective G-Code
To create effective and efficient G-code, here are some best practices to keep in mind:
1. Start Simple
Begin by writing G-code for simpler parts. This will help you understand the movement commands and how the machine interprets them.
2. Simulate First
Use simulation software to run the G-code before loading it onto the CNC machine. This step helps prevent potential collisions or errors that could damage the machine.
3. Utilize Tool Length Compensation
G-code commands like G43 are used for tool length compensation, which is important to ensure that your cutter reaches the correct depth.
4. Optimize Feed Rates
Choosing the right feed rate is critical for both tool life and precision. CAM software often suggests optimal feed rates based on the material and the tool.
Advanced G-Code Tips for CNC Machines
1. Coordinate Systems (G54, G55, etc.)
G-code commands like G54 are used to define different work offsets. This allows you to easily switch between different setups and makes multi-part production easier.
2. Use Subprograms for Repetitive Operations
Subprograms allow you to use the same set of G-code commands multiple times without copying them. This can simplify the G-code and reduce file size.
3. Control Unit Measurement
Switch between metric and imperial units using G20 (inches) and G21 (millimeters). Always specify the unit at the beginning of your G-code to avoid confusion.
Recommended CNC Spindle Motors for Effective G-Code Execution
For reliable results in your CNC operations, choosing the right spindle motor is crucial. We recommend:
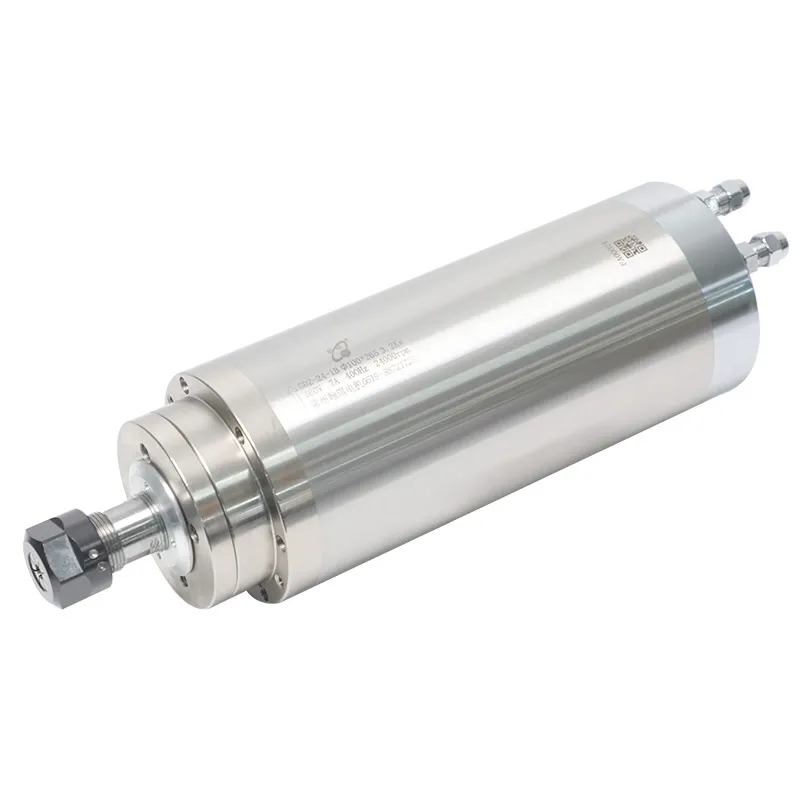
- 24000RPM 3.2KW ER20 Water-Cooled Spindle – Ideal for high-speed machining and precision operations.

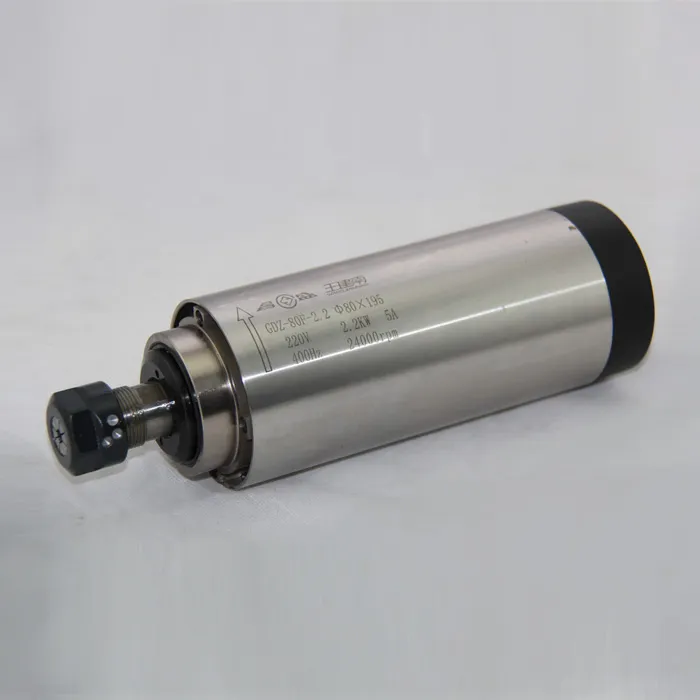
- 2.2KW ER20 Air-Cooled Spindle – Suitable for a wide variety of materials and ensuring clean, precise cuts.

Conclusion
Learning how to create G-code for CNC is a fundamental skill for anyone interested in CNC machining, from hobbyists to professionals. With a thorough understanding of how G-code commands control machine movements and operations, you can ensure precision, reduce waste, and streamline production processes.
By mastering the essentials of CAD/CAM, understanding critical G-code commands, and knowing when to manually tweak G-code, you can elevate the quality of your machining projects. Whether you write G-code by hand or use CAM software, the key lies in practice and understanding the unique needs of each project.
Interested in boosting your CNC machine setup? Explore our selection of high-quality CNC Spindle Motors to find the perfect fit for your machining needs.
Frequently Asked Questions
1. What software do I need to create G-code?
You need CAD software for design and CAM software to generate G-code. Popular choices include Fusion 360, AutoCAD, and Mastercam.
2. Can G-code be written manually?
Yes, G-code can be written manually, especially for simple parts or basic operations. However, CAM software is recommended for more complex geometries.
3. What is the difference between G0 and G1?
G0 is a rapid movement command, while G1 controls linear movements at a set feed rate, allowing for cutting or shaping.
4. What does G43 do in G-code?
G43 is a tool length compensation command that adjusts the tool position based on its length, ensuring accurate cuts.
5. Do I need to use canned cycles?
Using canned cycles like G81 for drilling can simplify your G-code and save time when performing repetitive operations.

