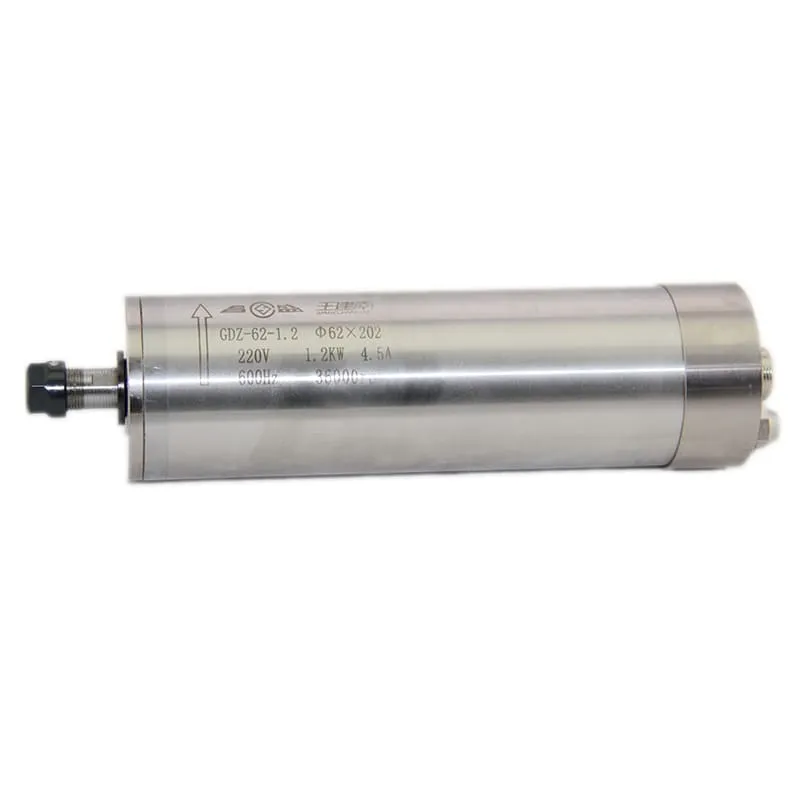
Achieving precision in CNC router operations is largely about making sure every part of your machine is perfectly aligned. This process is known as tramming. Tramming a CNC router ensures that the spindle is perpendicular to the table surface, which is critical for achieving smooth and accurate cuts. This guide will explain what tramming is, why it’s important, and how you can tram your CNC router efficiently to improve the quality of your woodworking projects.
Understanding Tramming in CNC Routing
Tramming refers to the alignment of the spindle or router head so that it is perfectly perpendicular to the CNC table in both the X and Y axes. This perpendicularity is crucial for consistent depth of cut and ensuring that flat-bottom cuts are truly flat. Tramming is essential for several reasons:
- Improved Surface Finish: When the spindle is out of alignment, the router bit may create uneven grooves, resulting in a poor finish.
- Extended Tool Life: Misalignment increases the wear and tear on bits, which reduces their useful life.
- Greater Precision: A properly trammed router delivers more precise cuts, which is vital for high-quality woodworking.
If you need a spindle that’s well-suited for maintaining accuracy, check out our CNC Router Spindles section.
Tools You Need for Tramming a CNC Router
Essential Tools
| Tool | Purpose |
|---|---|
| Dial Indicator | Measures the deviation of the spindle from the table plane |
| Tramming Plate | Helps provide an accurate surface for testing alignment |
| Socket Head Screws | Adjusts the router mount or spindle head position |
| Wrenches | Tightens the spindle mount after adjustments |
Using the right tools for tramming is just as important as using high-quality components. For spindle recommendations, visit our spindles for CNC router page.
Step-by-Step Guide to Tramming a CNC Router
1. Set Up the Dial Indicator
The first step to tramming a CNC router is to attach a dial indicator to the spindle. The dial indicator should be securely mounted to the spindle with a holder or tramming arm.
- Dial Indicator Setup: Mount the dial indicator so that it makes light contact with the router table. The contact point should be at an even height around a 4 to 6-inch radius from the spindle’s center.
- Rotational Sweep: Sweep the indicator in a full circle to determine if the reading changes. Any variation in readings will indicate that the spindle is out of tram.
Tip: Always check the tightness of your router or spindle mount before starting. A loose mount can affect tramming accuracy.

2. Check the Tram in X and Y Axes
Tramming requires checking alignment in both X and Y axes.
- X-Axis Adjustment: Start by checking the tram across the X-axis. If the dial indicator shows a deviation, it means that the router head is leaning forward or backward.
- Y-Axis Adjustment: Rotate the dial to check alignment across the Y-axis. This ensures that the spindle is not leaning left or right.
If either axis shows misalignment, adjustments will need to be made to correct the tilt.
3. Adjust the Spindle Mount
Once you determine which axis requires correction, you can begin adjusting the spindle mount.
- Socket Head Screws: Most CNC routers have socket head screws that hold the spindle mount. Loosen these screws slightly to make adjustments.
- Use Shims if Necessary: In some cases, you may need to use shims to adjust the tilt of the router mount. Place a thin shim between the router mount and the z-axis carriage to correct the tilt.
- Tighten Securely: After adjusting, ensure all bolts and screws are tightened securely to maintain the correct tram.
Quote: “The key to good tramming is patience and small, precise adjustments. Rushing through the process often leads to poor alignment and inconsistent cuts.” – CNC Technician, Alan Rodgers
Testing the Tram
1. Perform a Test Cut
After completing the tramming process, perform a test cut to verify that the machine is correctly aligned. Use a flat piece of wood and a surfacing bit to cut a shallow pass across the surface.
- Observe the Surface: If the tramming is accurate, the surface will be uniformly smooth. If there are ridges, it indicates that further adjustment is necessary.
2. The Paper Test
Another simple method to verify tram is the paper test. Place a piece of paper under the spindle, and try rotating the spindle across a flat surface. If the paper catches or doesn’t move smoothly, it may indicate that one side of the spindle is higher than the other.
3. Use a Tramming Plate
For better accuracy, use a tramming plate to ensure that the spindle is aligned over a wider area. This plate provides a reliable reference surface and can help catch minute misalignments that may go unnoticed otherwise.

Common Mistakes When Tramming a CNC Router
1. Overlooking the Tightness of the Spindle Mount
One common mistake when tramming is failing to properly tighten the spindle mount after adjustments. A loose mount can throw off the alignment, making the tramming process ineffective.
Solution: After each adjustment, double-check that all bolts are tightened correctly. Loose bolts can result in vibration and movement, which affects cutting quality.
2. Misinterpreting Dial Indicator Readings
It’s easy to misinterpret the readings from a dial indicator, especially for those new to CNC work. Dial indicators can show very small variations, and it’s crucial to understand what these readings mean for the alignment of your machine.
Solution: Rotate the spindle multiple times to confirm the readings, and take note of any consistent patterns before making adjustments.
3. Ignoring Small Deviations
Small deviations in the dial readings might seem negligible, but they can have a significant impact on the quality of the cuts.
Solution: Aim for zero deviation when tramming your CNC router. Small misalignments can result in visible lines or gouges in your final product, particularly in large or intricate cuts.
Recommended CNC Spindles for Enhanced Precision
The right spindle is crucial for ensuring that your machine stays in tram. Here are some recommended spindles from our collection that are ideal for CNC routers:
- 2.2KW ER20 Air-Cooled Spindle
- 24000RPM 1.5KW ER11 Water-Cooled Spindle
- 60000RPM 1.2KW ER11 Water-Cooled Spindle

FAQs
1. How often should I tram my CNC router?
It depends on how frequently you use your CNC machine. If used daily, tramming should be checked weekly or bi-weekly. For occasional use, a monthly check should suffice.
2. What are the signs that my CNC router needs tramming?
Visible ridges on the cut surface or uneven depths of cut are common signs that the spindle is not properly aligned.
3. Can I tram my CNC router without a dial indicator?
While it is possible to tram a CNC router using visual aids and simple tools like a carpenter’s square, a dial indicator provides much greater accuracy.
4. How do I know if my adjustments are working?
After each adjustment, use the dial indicator to check for changes in readings. The goal is to have no variation across the entire sweep.
5. Is tramming necessary for every CNC project?
If precision is crucial, tramming is necessary. Projects involving detailed carvings, intricate joinery, or flat surface finishes will benefit significantly from a trammed CNC router.
Conclusion
Tramming your CNC router is an essential part of ensuring precision in your projects. By taking the time to set up a dial indicator, making small adjustments to the spindle mount, and thoroughly testing your results, you can achieve smoother cuts, extend tool life, and improve overall machine accuracy. Remember, patience is key when tramming. Small, incremental adjustments will lead to big gains in performance and final product quality.

